



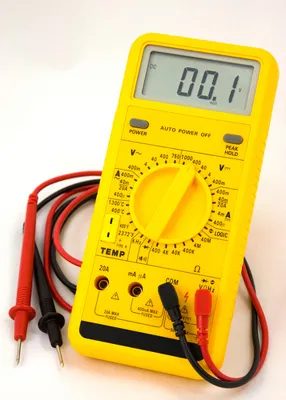
Electrical work isn’t about guessing. It’s about knowing. A voltage tester is the simplest way to check for current flow and proper grounding in your home’s circuits. You don’t need a multimeter or a degree in engineering. You just need this basic tool and some caution.
The device itself is straightforward. It features a small neon bulb housed in a plastic casing. Attached to the bottom are two insulated wires, each ending in a metal test probe. You pick up a model rated for up to 500 volts. That covers almost everything in a standard US home.
How a Voltage Tester Works
You use this tool with the power turned on. The goal is to see if electricity is actually moving through the wire.
To test a circuit, touch one probe to a wire and the other to the opposite wire or connection. If the component is receiving electricity, the neon bulb glows. Simple as that. If the light stays dark, there’s a problem at that specific point.
Think of it as a binary signal. Light means go. No light means stop.
The glow of the neon bulb is the only confirmation you need to know if adequate voltage is present.
Testing an Outlet Step-by-Step
Let’s say you plug in a lamp and it doesn’t work. Or you suspect a wall outlet is dead. Don’t rip out the cover plate yet. Start with the tester.
- Insert the probes. Push one probe into one slot of the outlet. Push the other probe into the other slot.
- Observe the bulb. The light should glow. If it does, you have power at the receptacle.
- No light? The outlet might be bad, or the power is cut further upstream.
If the light doesn’t glow, you need to dig deeper.
Pull the outlet out of the wall. Be careful. The box will be tight. You’re exposing the terminal screws now. Place one probe on one screw and the other probe on the opposite screw.
This tells you exactly where the break is.
- Light glows: Current is flowing to the outlet. But it isn’t flowing through the outlet to your appliance. The outlet itself is malfunctioning. Replace it.
- No light: No current is coming into the outlet. The problem is upstream. Check your circuit breaker. It might have tripped. Or check your fuses. The wire behind the outlet could be disconnected or broken.
Safety and Compatibility
Is it safe? Yes. These testers are designed for live circuits. The insulated wires and probes protect you from shock. But don’t get complacent.
Always check the voltage rating on your specific tool. Not every tester works on every system. If you’re dealing with high-voltage industrial equipment, a standard 500-volt home tester might not be appropriate. Stick to residential use with your standard kit.
Why This Matters
Diagnosing electrical issues doesn’t require a pro’s fee. It requires a $5 tool and the willingness to look. Most homeowners skip this step. They assume the wire is fine because the breaker is on. They assume the outlet is dead because the lamp didn’t work.
A voltage tester removes the assumption. It gives you data.
- Glowing light = Power present.
- Dark bulb = Power absent or component failure.
You can determine if an outlet is faulty. You can tell if there’s no current coming into a wire. You can identify a blown fuse before you even open the panel.
The Bottom Line
Keep a voltage tester in your toolbox. It’s one of the essential home repair tools. Pair it with a continuity tester if you want to check appliance components. But for checking wiring and outlets in your home, the simple neon tester is all you need.
Test the slots. Test the screws. Watch the bulb.
If the light doesn’t glow, you have a problem to solve. If it does, you can move on to the next fix.