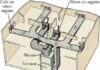





Autumn is setting in. November arrives with its rains and its gray days. Now is the perfect time to replace an old model or finally unbox that promised machine. But be careful. A poorly installed washing machine is not a minor nuisance. It’s a time bomb. A loose joint. A blocked evacuation. The first cycle is running. And then the water begins to ooze. Or worse, overflowing.
The excitement of a new start evaporates instantly. Don’t let this ruin your investment. Here’s how to do it step by step. From choosing the laundry area to the final test. For a clean result. For peace of mind.
Choose the ideal location to limit vibrations
Forget the idea of dragging the machine anywhere. It weighs heavy. Between 60 and 80 kg on average. If the ground is flat, unstable or uneven, the result will be violent. The machine will dance while spinning. She may even move.
You need solidity. A sturdy and perfectly 水平 (level) floor. Ideally, place it near water inlets and evacuation points. Fewer stretched pipes. Less risk of leakage.
And don’t stick it to the wall. Leave a small space. This makes it easier to connect the pipes. And this reduces the resonance noise that comes up into the partitions.
The basic tool kit so you don’t forget anything
You don’t need a full workshop. Just the essentials. Prepare these items before you begin:
- Multi-grip pliers.
- A spirit level. Essential for checking plumbness.
- Replacement seals. Don’t take risks.
- A small bucket. In case.
- A dry cloth. To wipe away the first suspicious drops.
The kit supplied with the appliance often contains the inlet hose and the drain hose. Check their lengths. If your location is off-center, they risk being too short or too tight. Better to buy compatible extensions than to force the connections.
Check compatibility of water connections
This is the crux of the matter. A faulty water installation leads to flooding. No wiggle room here.
The water inlet pipe is generally made of reinforced plastic or stainless steel. But threading is key. In France, the standard is often 20×27 mm. Older faucets may have different threads. Check the match. A pipe that forces the joint will leak. Slowly. But surely. And it will ruin your floor in no time.
Before you screw anything in, test the faucet. Is the water flowing well? Are there any drips at the existing joint? If so, replace it. On self-piercing faucets, make sure the hole is not clogged with debris. And never neglect the fiber seal. It is often the cause of insidious oozing.
Connect pipes precisely
Assembly seems simple. It’s a science. One mistake here and the entire system is compromised.
Connecting the water supply
Never machine tighten straight away. Start screwing by hand. This avoids deforming the thread. Once it is firmly engaged, use the multi-grip pliers. But a quarter turn is enough. Don’t force it. A joint that is too crushed or a connection that is too tight will crack. Give the water time to find its way.
Check that the hose is not kinked. Twisting in the hose creates excessive internal pressure. This is a common cause of breakups.
Evacuation: the slope is king
Classic forgetting. We think about the arrival, we forget the exit. The drain pipe must be connected to the siphon or to a wall drain. But it must follow a natural slope. The water should flow downward.
If the pipe rises too high or becomes stagnant, water may back up. Manufacturers recommend not exceeding 90 cm in height for the end of the drain pipe. Avoid excessively pronounced elbows. In winter, residue accumulates more quickly. A good slope is your best insurance.
Tests before the first wash
Don’t throw away your black clothes just yet. Test first.
The waterproof test
Let the water flow through the connected pipes. Inspect the joints. Wipe a dry cloth around the connections. If the cloth gets wet, you have a leak. Tighten gently. Or replace the gasket. Don’t take risks.
The empty cycle
Run a short, empty program. This allows manufacturing residues to be removed. But above all, it puts the evacuation system to the test. Check that the water comes out well. That there is no repression. That there is no overflow.
If everything seems to be working, you can breathe. Your washing machine is installed. All that remains is to fill the drum. But for now, enjoy this silence. And this absence of drops. It’s the most beautiful sound of fall.
Final checks before you hit the power button
You’ve got the machine in place. The hoses are connected. Now comes the part where you decide if your kitchen floor stays dry or starts a slow rot. It isn’t hard. But you have to be careful.
First, look at that water supply line. Does it have slack? If you’re pulling it tight to reach the valve, stop. You are creating tension. Voltage leads to leaks. You want a gentle curve. No kinks. No stretching. The threads inside the valve are delicate aluminum or plastic. You do not want to crush them with brute force. Hand tight first. Then a quarter turn with a wrench. That’s it. Force breaks things.
Next, check the drain hose. It needs slope. Gravity is your only friend here. If the hose runs uphill even for an inch, water will back up. It will overflow. You will stand there watching dirty water creep out of the door seal. Ensure the hose height matches your machine’s spec sheet. Usually, that means it needs to loop up or sit at a specific height on the standpipe. Don’t guess. Check the manual.
Once everything feels snug, do not just start washing. Turn on the water supply. Wait. Watch the connections. Look for drips. Small beads of moisture mean a loose fitting. Big droplets mean a failed gasket. Fix it now. It takes two minutes. It saves you from a flooded basement later.
The test run
With the water on and the hoses dry, it’s time for the empty cycle. This is non-negotiable.
Load nothing in. Just the machine. Select the hottest water setting available. High heat helps expand the gaskets and seal the joints properly. Start the cycle. Watch it fill. Watch it drain. Listen for weird noises. If it hums smoothly, you’re good. If it shakes violently, check your shipping bolts. If you leave them in, the machine will dance off the floor.
Do one or two empty cycles. This clears out any dust from manufacturing. It also proves the system holds pressure. If there is a leak, it will show up here. Not after you’ve washed your white shirts.
Why rushing ruins everything
Homeowners often skip this. They want to wear the jeans they washed yesterday. They treat the installation like a formality. But water does not care about your schedule.
Always inspect the rubber washers before you connect the pipes. They can dry out. They can crack. A new washer costs two dollars. Water damage costs thousands. Swap them out if they look old. It’s a five-second job that pays off for years.
Also, never force a stubborn connection. If a nut won’t budget, back it off. Check for cross-threading. Real thread. Misaligned thread. Force just strips the metal. You end up with a leak that no amount of tightening will fix. You’ll need a plumber. And plumbers are expensive.
The season is changing. The air gets colder. Dampness lingerie. Every drop of water you stop from escaping your machine is a victory. You keep your floors safe. You keep your mind quiet.
So tighten up. Check the drain. Run the empty load. Then forget about it. Your laundry can wait until tomorrow.